Interested in how to take notes on the iPad?
Maybe you’re starting a new school year, or looking to upgrade from your plain paper notebooks.
In any case, we put together this guide to help you navigate the world of digital notes.
Here’s everything you need to know about how to take notes on the iPad.
Which iPad is best for Note-Taking?

While all iPads are going to give you a great note-taking experience, here are some recommendations for how to choose:
- If you want the absolute best experience, get the iPad Air — the 2nd Generation Apple Pencil makes all the difference.
- If you’re going to be taking notes on the go, get the iPad Mini. It’s a convenient portable size, while still being comfortable to write on. A lot of medical students, for example, like to take the iPad Mini in their lab coat and take notes on the go.
- If you want to run demanding tasks, get the iPad Pro. Its M4 processor is perfect for video editing or 3D rendering on the go.
- If you’re on a budget, get the original iPad. Note-taking on this iPad is still a delight.
Note: The original iPad only supports the Apple Pencil 1. The iPad Air, iPad Pro, and iPad Mini all support the Apple Pencil 2. (Find more details about compatibility here.)
If you’re looking for an iPad for college, in addition to note-taking, there are some more things to consider. Read our comparison on the best iPad for college here.
All 4 models of the iPad will offer a superb note-taking experience, but the key differences come down to which note-taking app and Apple Pencil you use.
Apple Pencil 1 vs. 2 for Note-Taking
Which Apple Pencil should you choose for note-taking?
We think the 2nd Generation Apple Pencil gives you a better overall note-taking experience. It’s compatible with all new iPad models, except for the original iPad.
But what makes the Apple Pencil 2 better?
- Automatic charging. The Apple Pencil 2 magnetically attaches to the side of your iPad, and automatically charges. The Pencil 1 on the other hand charges by plugging into the iPad’s lightning port, which is a bit awkward.
- Premium feel. While the Apple Pencil 1 is glossy, the Pencil 2 has a matte finish which is resistant to fingerprints. It’s also slightly weightier (though not heavy by any means).
- It won’t roll away. The Apple Pencil 2 has a flat which allows you to comfortably grip the pencil, and also prevents rolling. When you’re not using it, you can stick it back onto the side of your iPad.
A New World Unlocked: Note-taking with the Apple Pencil Pro
More options with a squeeze
The Apple Pencil Pro can sense when pressure is applied to the device — and when a squeeze is applied, you can easily switch tools, pen colors, or line weights.
More precise notes with the barrel roll!
Equipped with a new gyroscope, the Apple Pencil Pro can generate more precise brush strokes, far more similar to how actual pencils work in real life!
But there’s more in store for Goodnotes: learn about everything you can do with the Apple Pencil Pro in Goodnotes.
How to Write Neatly on the iPad
At first, writing on an iPad can feel unfamiliar and a bit unnatural. Here are some easy tricks to make your handwriting on the iPad look nicer.
1. Use a matte screen protector
Tired of your Apple Pencil slipping around on your screen? A matte screen protector is an easy fix.
A matte screen protector will give just enough friction to mimic the feeling of your pen on paper.
However, many matte screen protectors will also decrease the crispness of the iPad’s display. Something to keep in mind if your primary use case isn’t note-taking with the iPad.
2. Write on graph paper (and then switch back to blank!)
Here's an easy trick to write perfectly straight:
Write on graph paper and let the grid lines help you align your writing. Then, once you’re done writing, switch the paper template back to blank.
Voila! You've got perfectly aligned writing.
Here’s a free downloadable graph paper template.
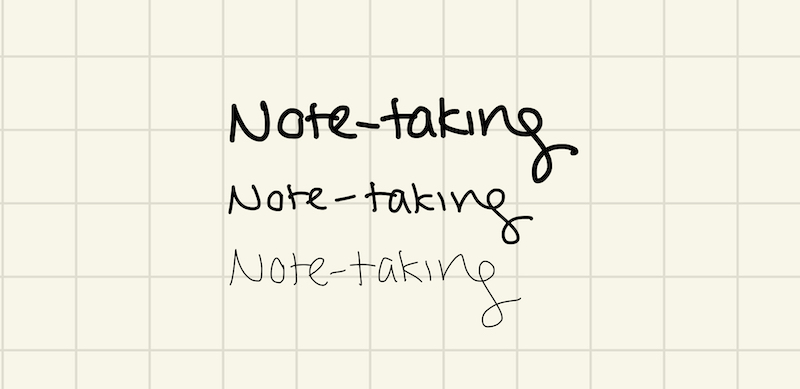
3. Write with a thicker pen size.

If you’re not confident about your handwriting, try using a thicker pen stroke.
Surprisingly, a thicker pen can make wobbly strokes look smoother.
Try increasing the thickness of your strokes, and you might be surprised by how much nicer your handwritten notes turn out.
4. Take advantage of note-taking templates and layouts.
Want beautiful notes without spending ages thinking about the layout?
Use a pre-designed template.
Note-taking apps like Goodnotes will allow you to import templates to write on, including planners, bullet journal spreads, and already come with over 100 default templates for you to choose from (plus an in-app shop to get more).
Want tips on how to create beautiful notes? Here’s a guide on how to create aesthetic notes on the iPad.
What’s the Best Note-Taking Method?
How should you structure your notes on the iPad? That’ll depend on your use case. Here’s a quick overview on different note-taking methods and when to use each.
For lectures: Cornell notes

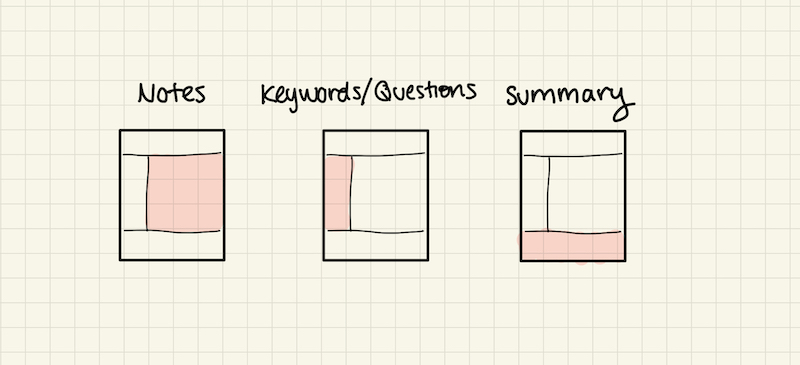
Cornell notes are the best note-taking method for students because they are easily skimmable and easy to review.
Write your main notes in the main section, while labeling the content in the left column. After you’re finished, take some time to summarize the whole page in the bottom section.
For meetings: Cornell notes
When it comes to meeting minutes, the most important thing to record is the next step or actionables.
The summary at the bottom of Cornell notes works as a clear callout section for the outcome of the meeting.
(Here’s a free downloadable template for Cornell Notes).
For brainstorming: Mind maps
If there’s one note-taking method that enables your creative thinking, it’s mind-mapping.
Take a blank page and note your thoughts freely in bubbles. Draw lines between related things and watch your ideas fill the page and take shape.
The best part is that you don’t need full sentences, and can simply write down words or ideas as they come.
For comparisons: Charting method
If you’re comparing things based on set criteria, use a chart.
Comparison charts make things easier to understand, because they allow you to compare different items against the same criteria. This is great for comparing iPad models, hotel prices, or even which university to go to.
For planning: Outline method
The outline method of note-taking is an effective way to organize or plan projects. By breaking down your plan into a hierarchical structure, you can see the big picture or goals, the details, and the steps that support it.
Interested in more? Here’s a more in-depth guide to different note-taking methods.
Bonus: Take a peek at how to bullet journal with Goodnotes.
Note-Taking with Goodnotes on the iPad
We can't talk about note-taking on the iPad without talking about Goodnotes (that's us!), which won Apple’s 2022 iPad App of the Year.
Here’s a snapshot of what you can do with Goodnotes:
- Replace all your physical notebooks, including planners, note pads, school notebooks and more
- Import and annotate PDFs – perfect for annotating lecture slides, articles, or textbooks
- Share and collaborate on your notes
- Search your handwriting to find exactly the page or notes you’re looking for
On top of these features, Goodnotes is known for having some of the best writing and ink experiences of the iPad note-taking apps available. Writing with GoodNotes just feels good.
Tip: If you’re using Goodnotes, you can record audio alongside your handwritten or typed notes. That way, in addition to your own notes, you can also listen to the full context of whatever you’re recording to fall back on.
How to Take Notes on the iPad - FAQs
What are the best note-taking apps for iPad?
Goodnotes won Apple’s 2022 best iPad app of the year award.
OneNote, Notability, and Noteshelf are also well-reviewed note-taking apps.
How do I sync notes between iPhone to iPad
With synced notes you can access your documents on any device and keep them up-to-date automatically.
Here are the steps to sync notes between your iPhone and iPad:
- Make sure both devices are signed in to the same iCloud account.
- On your iPhone, open the Settings app, and tap on your name at the top of the screen.
- Tap on iCloud, and make sure the toggle switch next to Goodnotes (or whatever note-taking app you’re using) is turned on.
- On your iPad, repeat steps 2 and 3 to make sure Notes is turned on.
- To check if your notes are syncing, open the Notes app on both devices. If your notes are syncing, you should see the same notes on both devices.
Tip: Goodnotes offers an automatic backup option. If you don’t want to take up your iCloud storage, you can backup your notes to Google Drive, Dropbox, or OneDrive (although it isn’t a true sync). Read more here.
How do I set up palm rejection on iPad?
The iPad has a built-in feature called Palm Rejection that can help differentiate the Apple Pencil’s marks vs. your finger or palm. It’s automatically toggled on, so you don't have to worry about setting it up!
Which iPads work with which Apple Pencils?
You can use Apple Pencil 2 with these iPads:
- iPad mini (6th generation)
- iPad Air (4th generation and later)
- iPad Pro 12.9-inch (3rd generation and later)
- iPad Pro 11-inch (1st generation and later)
- Apple Pencil (1st generation)
- Apple Pencil (1st generation)
The Apple Pencil 1 is compatible with these iPads:
- iPad mini (5th generation)
- iPad (6th, 7th, 8th, and 9th generation)
- iPad (10th generation)*
- iPad Air (3rd generation)
- iPad Pro 12.9-inch (1st and 2nd generation)
- iPad Pro 10.5-inch
- iPad Pro 9.7-inch
Welcome to the world of digital note-taking
Ready to start note-taking with your iPad? Join millions of students, digital planning enthusiasts, and digital note-takers using Goodnotes.
