So your school just introduced Goodnotes Classroom and now you’re wondering how to get started and make the most out of the new tool? Great. You’re in the right place. In this article, we’ll walk you through the basics on how to get started with Goodnotes Classroom - step by step.
1. Set up your account
Setting up your account is quick and easy. When you open Goodnotes Classroom, you will be asked to sign in using one of the following services: Apple, Google, or Microsoft. Make sure to pick the one that is using your school domain. Otherwise, you won’t be able to join your institution.
Depending on what configuration your IT admin has chosen, you now either need to wait for them to verify your account or enter a code they should have shared with you to prove that you are really you.
Once you’re verified, you can already start using Goodnotes Classroom.
2. Understand the different sections in the app
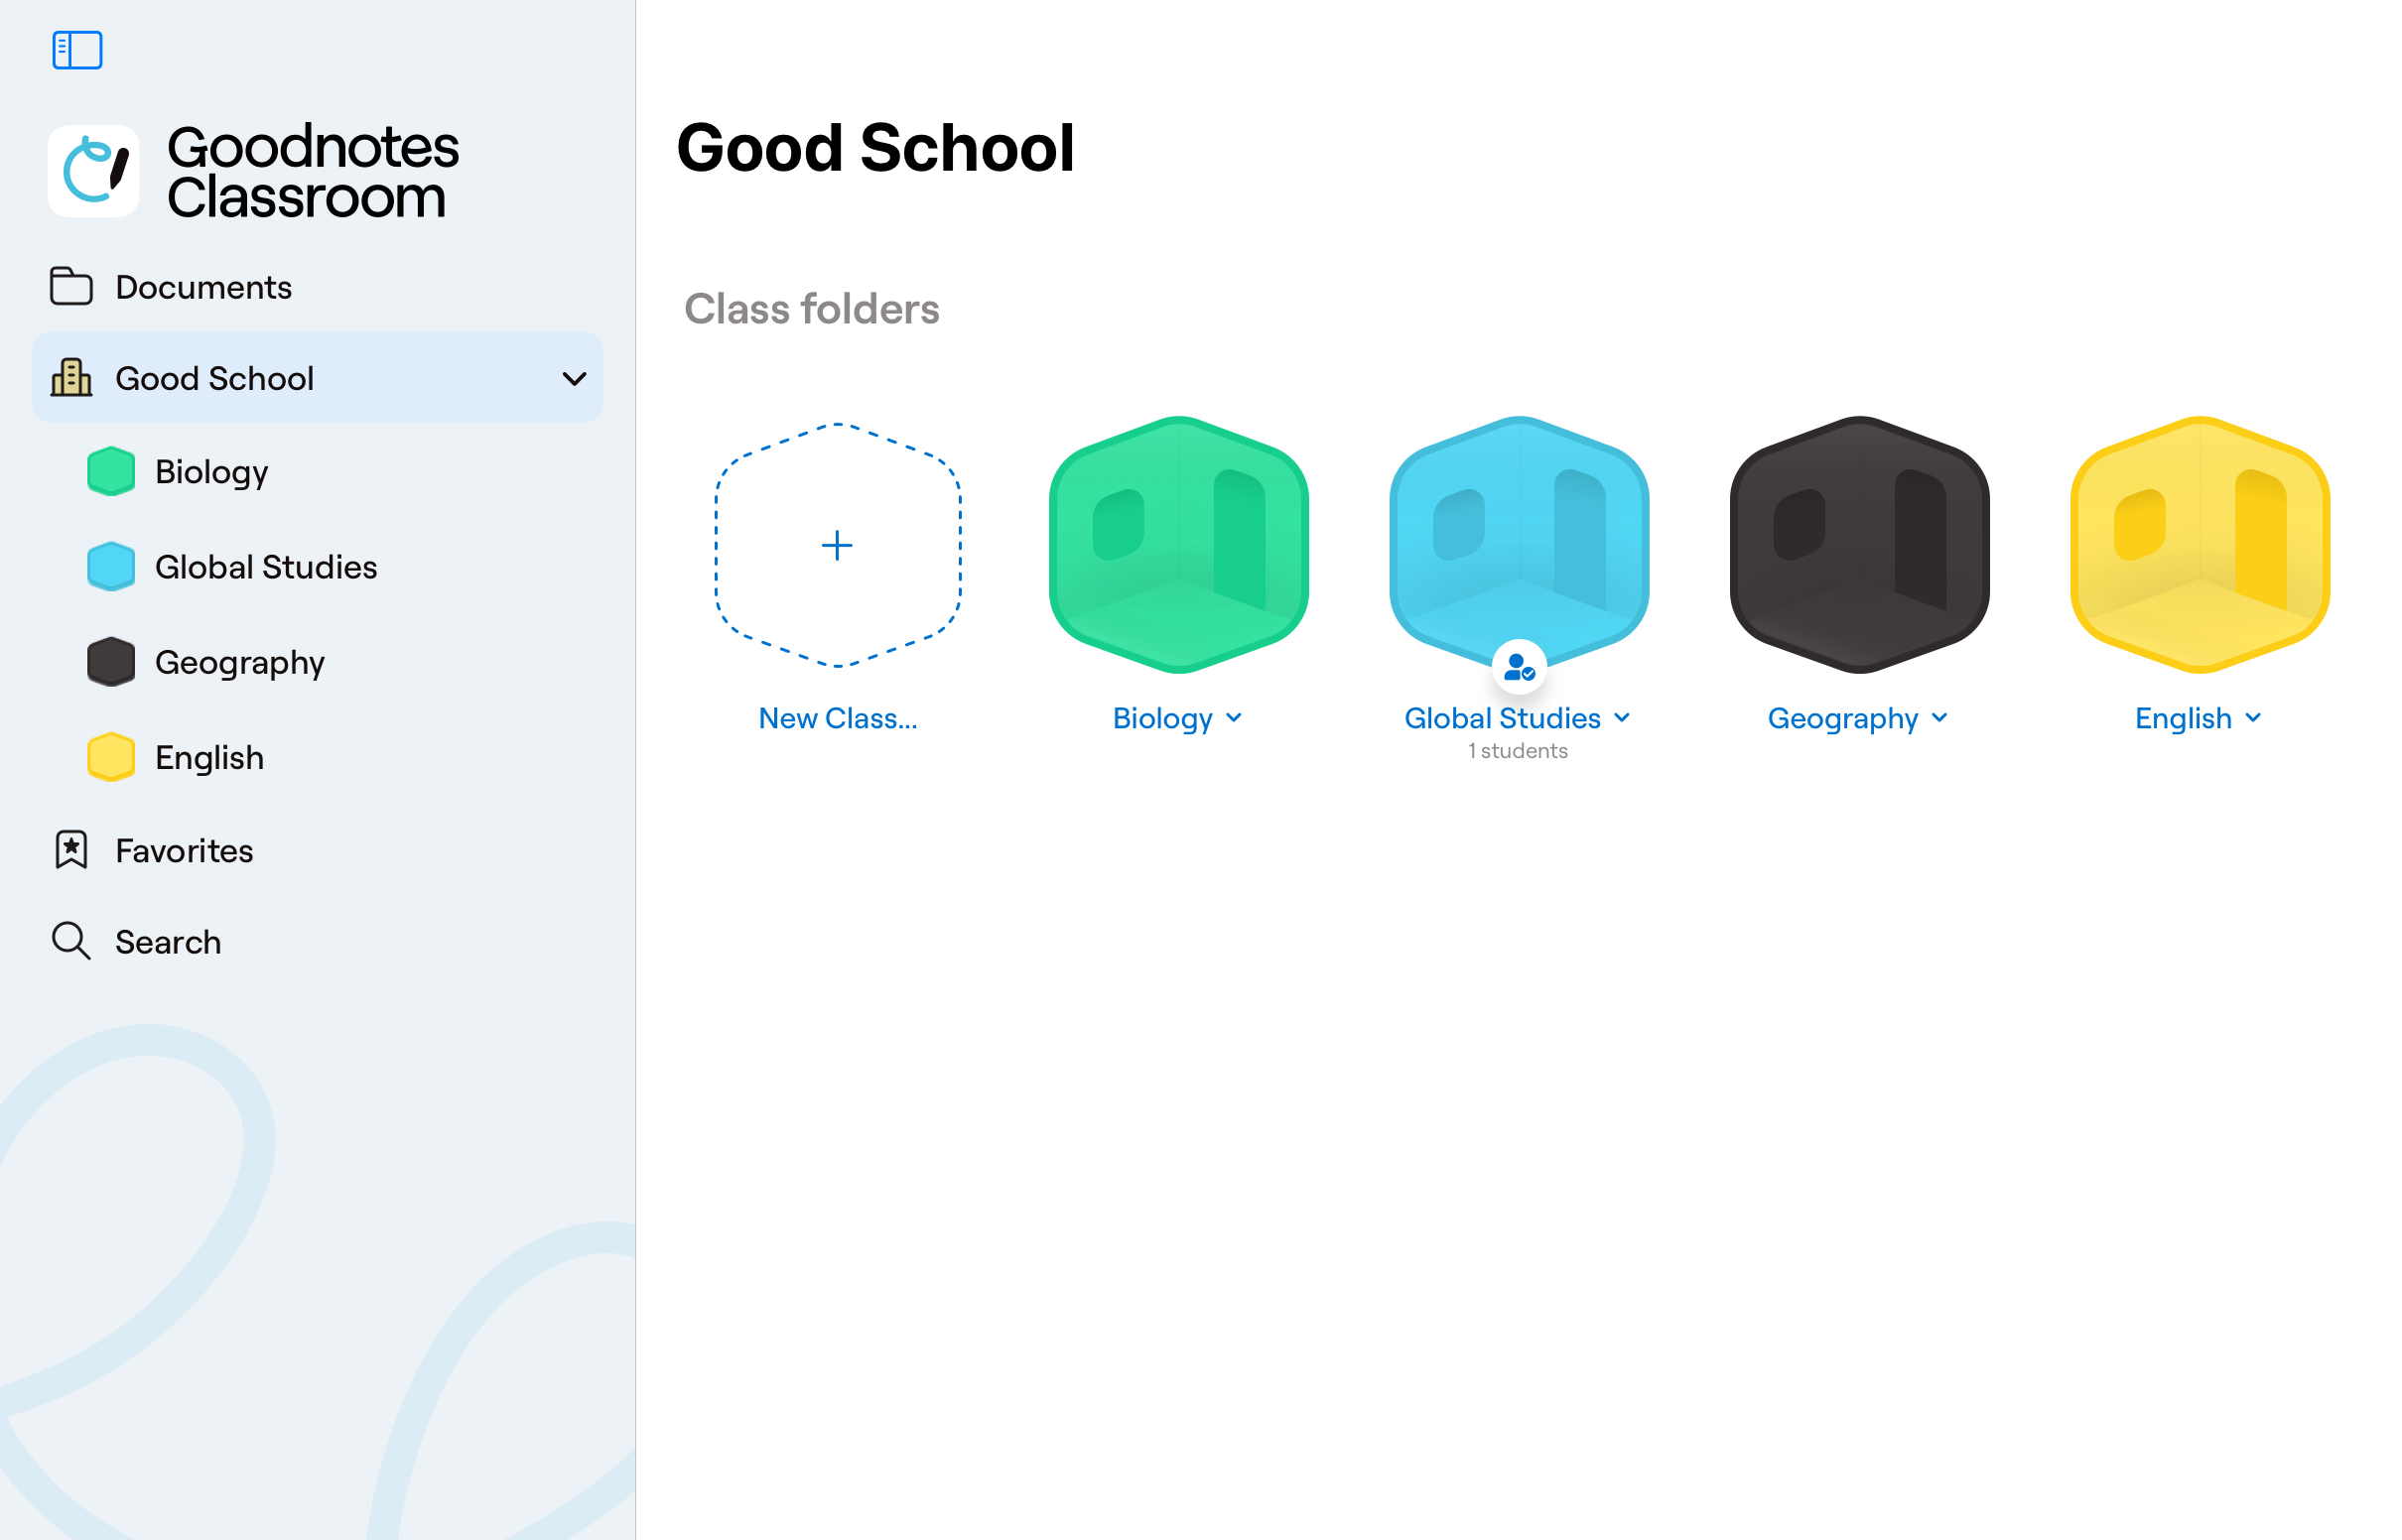
Goodnotes Classroom - much like Goodnotes 6 in case you have been using that - has different sections in the sidebar.
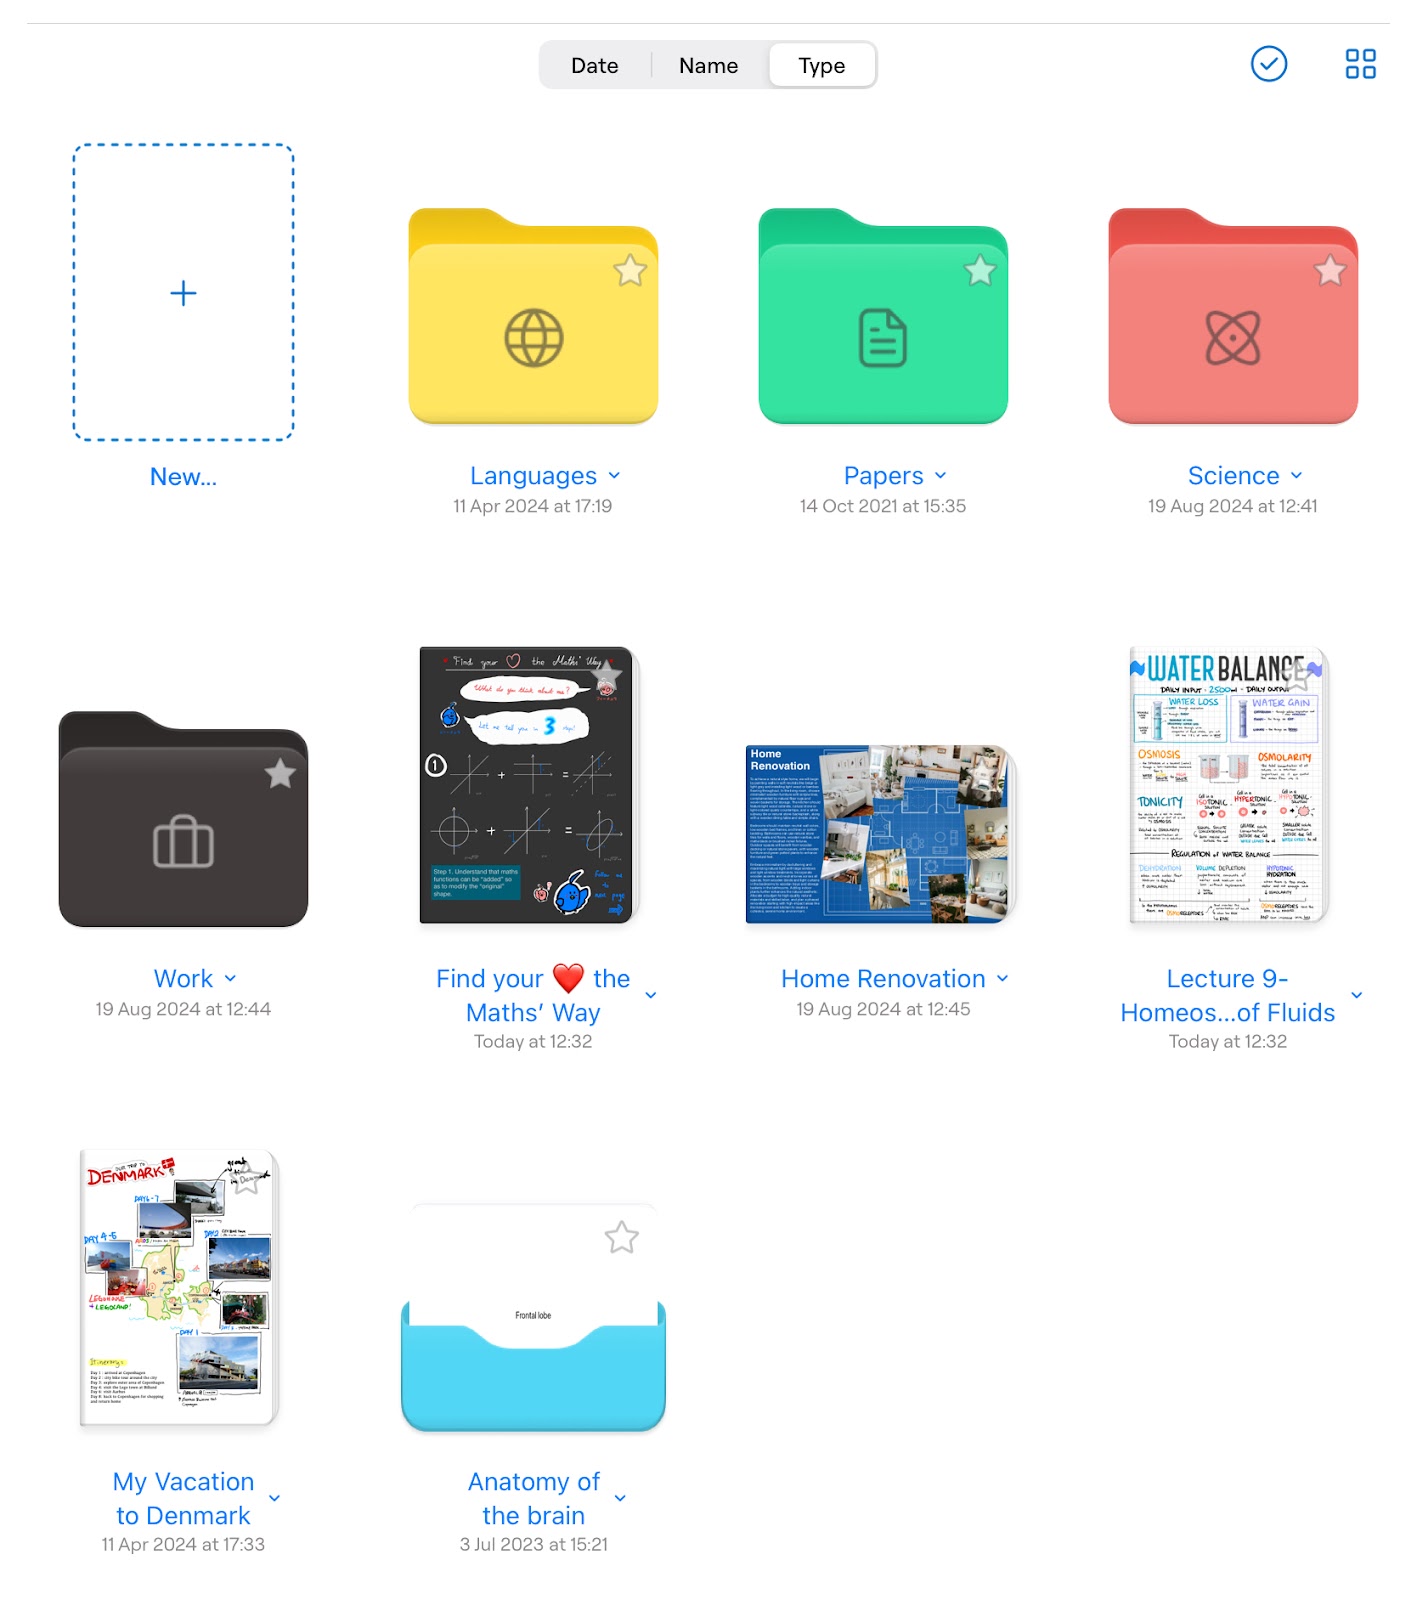
Documents
This is where you can create, import, and manage private or personal documents. You can use this section to prepare materials you’re later going to share with your class, take notes about your students’ performance, plan your lessons, or use it for any other personal things, like writing a diary or planning your home renovation project.
School/Institution
You should see the name of your school in the sidebar right under “My Documents”. This is where you create Class Folders to manage your classes, share class materials with your students, and teach lessons.
Favorites
This tab shows all the documents, folders, or pages you bookmarked/starred, so that you can quickly access them.
Search
From here you can search for handwriting, typed text, and PDF content in Goodnotes Classroom to quickly find what you’re looking for and open the exact page. Note that you currently cannot search for your students writing in Lessons.
3. Get to know the new document type “Lessons”, and create your first one
If you are already familiar with Goodnotes, you know that you can create notebooks from scratch or import PDF documents in order to annotate them. Feel free to skip directly to the section below where we introduce the new file format of a Lesson.
If you’re not familiar with Goodnotes yet, here’s a brief summary: Goodnotes documents can either be created from scratch inside the app or by importing an existing document into the app. The documents are similar to a ring binder, which allows the most flexible organization of your documents. You can add PDF documents to an existing document, combine it with blank pages, photos, or other documents, and even rearrange individual pages. All of the pages inside a document can be annotated as if you had printed them out. Of course with the big difference that you can add infinite pages to a document and that they are always going to be with you and can never be lost.
So what’s a “Lesson”?
With Goodnotes Classroom, we introduce a new document type which we call a Lesson. A Lesson is like a regular Goodnotes Document, but it is shared with your students through a Class Folder, which does three main things:
- Each student gets access to their own personal layer in the Lesson to work on, which is only shared with the teacher. Anything you add to the Lesson is automatically synced to theirs, and they're prevented from editing any teacher annotations.
- It gives teachers a whole new interface inside the document that allows for monitoring student work and progress in real-time, adding actionable and personal feedback, teaching through a digital whiteboard, and use AI to facilitate grading and get better insights on class performance
- It allows teachers to easily integrate student work into the lesson by sharing it on an external screen directly from the teacher device
What materials you want to add to a lesson to share it with your students directly and via a digital whiteboard is totally up to you. As an inspiration, here’s how a fictional lesson about the United Nations Sustainable Development Goals (SDG) could look like:
- Start off with a quick direct instruction where you provide an overview of the SDGs on a page and use the digital whiteboard in Goodnotes Classroom to add annotations on top of the page. Your students can add their own notes on the page
- Jump into an ice breaker question which you present on another page. For example, you could ask how much rainforest is lost each year due to deforestation. Your students will write down their guesses on the page, and you can then discuss individual responses in class by projecting them to an external screen, before you reveal the correct answers that you write on the whiteboard
- Move into further detail on some of the SDGs and use the digital whiteboard for temporary annotations like highlights. You can also edit the Lesson content directly so that your students will get access to the notes in real-time and can review them at home
- Run a short quiz on an imported PDF worksheet and use Goodnotes Classsroom’s features to monitor your students’ progress
- Close off with a group discussion where you record the results on a separate page, which automatically gets shared with your students
How to create a lesson
To create a Lesson in Goodnotes Classroom, all you need to do is to navigate to your Institution tab, open or create a Class Folder and then tap the + button to either import existing materials from somewhere or create a Lesson from scratch.
Alternatively, you can move documents from My Documents to a Class Folder which will automatically turn them into a Lesson as well. From there on, you can add more pages to the Lesson or continue to import documents into the same file.
💡Tip: If you want to keep the original document, duplicate it first and then move the copy to a Class Folder instead.
3. Manage your students and lessons in Class Folders
A Class Folder is the location where you can organize the materials you want to share with your students. To create one, just open the institution tab and tap the + button. You can already invite students to your Class Folder during the creation, or first create the folder and later add your students. Note that as soon as students are added to a Class Folder, they will have access to all the Lessons you have already created in there and can start making their annotations in them.
There are two ways of how to add students to a Class Folder:
- You can look them up in the list of students in your institution and search them by their name
- You can create a QR code that your students can scan with their devices and then join the Class Folder
Note that only teachers can create/import Lessons in Class Folders. Students currently are not able to add any content to Class Folders. They can only annotate the Lesson materials you shared with them.
4. Get class insights, grade, and give feedback
As we explained earlier, Lessons have a special interface for teachers where they can get class insights, grade, give feedback and do a lot of other things. The interface has two modes that allow you to control who sees the changes you make to the Lesson content: Prep Mode & Teach Mode.
Let’s take a more detailed look at both of them.
Prep Mode: Make changes that your entire class sees in real-time
The functionality of Prep Mode is rather simple to explain: All changes you make while in Prep Mode will automatically be visible to all of the students that have access to your Lesson through the Class Folder. If you write on a page, the changes will show up to your students in real-time. If you import a document into your Lesson, your students get access to it immediately. If you add photos to a page, they will also show up to your students. You get the idea.
Prep Mode is great to prepare your Lessons - hence the naming. However, don’t underestimate the ability to write in Prep Mode as a way to allow your students to focus on participation rather than having to copy everything you say.
Teach Mode: Get class insights, give feedback, and write on the whiteboard
Teach Mode with all of its features is the heart and center of Goodnotes Classroom. Let’s break it down.
Currently Teach Mode allows you to view your Lesson content and student work in two different ways - we call these Smart Views:
Smart View: By Page - See lesson materials through your students’ eyes
This is the default view in Teach Mode and should show up as soon as you open Teach Mode in a Lesson. You’ll see that the Class Navigator pops up at the bottom of the screen which shows all of your students. By swiping through the Class Navigator, you can see what each of your students is working on and you can see their changes appear in real-time. Even better, you can also give feedback directly to the individual student using all of the editing tools Goodnotes Classroom has to offer. Anything that you add to a student’s page will show up in real-time to your student, which means you can give timely and personal feedback.
💡Tip: The Elements tool has some great collections of stickers that you can add as feedback and you can even import your own 😊
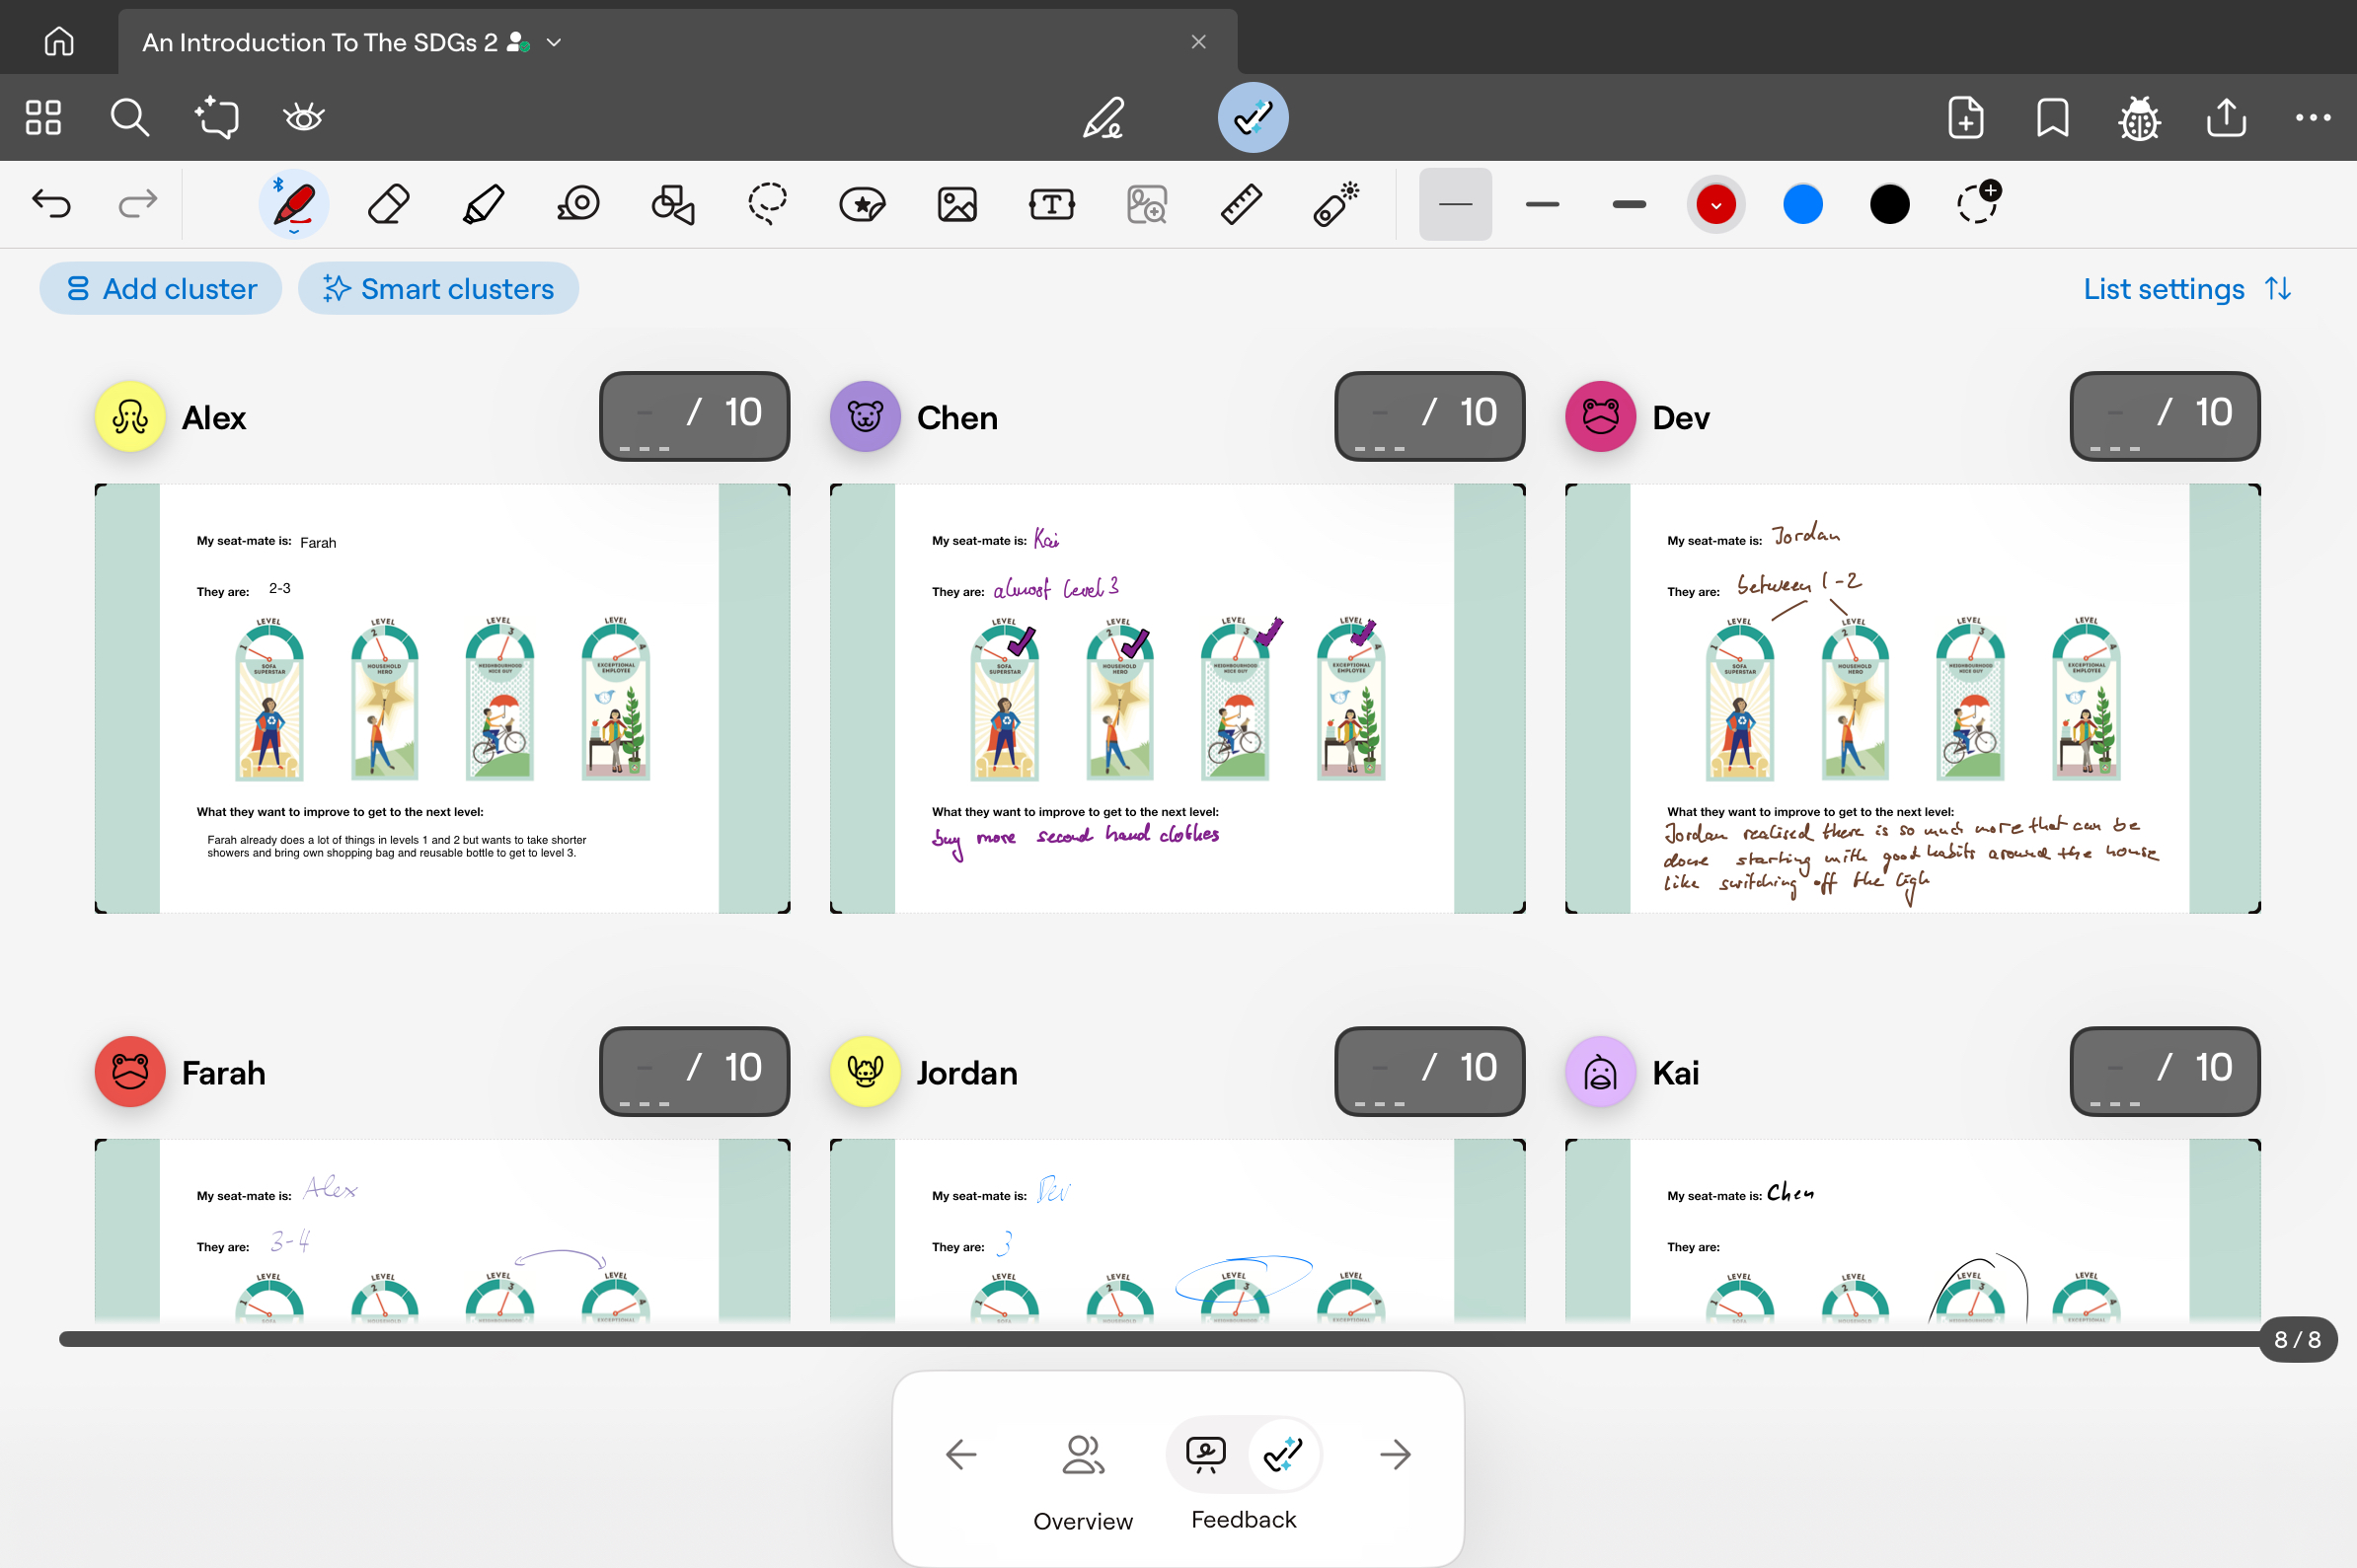
Smart View: By Question - Focus on particular questions and compare your students’ progress & answers
You probably know the struggle when grading worksheets or exams. Often, the most efficient way is to first grade all of the question 1s for all your students, then move on to question 2 and so on. With 30+ students in a class, your desk can get pretty messy.
Goodnotes Classroom’s Smart View by Question allows you to do exactly that, but just in a much neater way. Using the Answer Zone Tool in Prep Mode, you can define an area on a page that you want to focus on.
In Smart View by Question, you will now see all of your student’s work on only the defined area in a single overview and you’re able to write on these individual views to give feedback. You can also mirror this view to an external screen to discuss your students’ responses during your class
Try it out by importing a worksheet and then add Answer Zones around every question.
💡Tip: Answer Zones can also be added around entire pages, which allows you to get a birds-eye view of your students’ work on the lesson materials.
Write on the whiteboard
Since all annotations you make in Prep Mode also show up to your students and changes you make while using Feedback, are only showing up to individual students, what do you do when you want to add changes that are not supposed to be added directly to any of your students’ pages?
Right, you use the Whiteboard in Goodnotes Classroom.
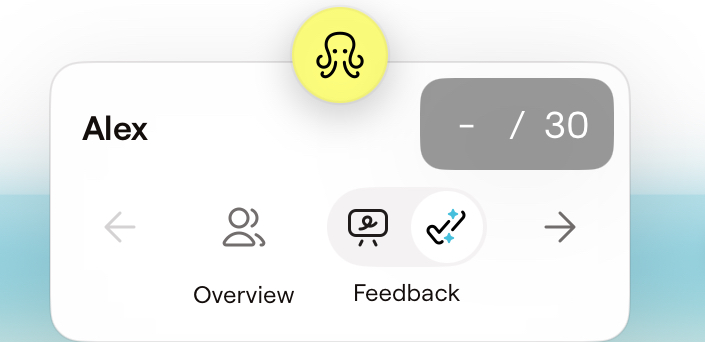
In Teach Mode, you can either use the Feedback or the Whiteboard option, which are located at the bottom of the Class Navigator below the student avatars.
Changes you make in the Whiteboard are only visible on your device, which means it is perfect for projecting your iPad to an external screen and using Goodnotes Classroom as a digital whiteboard. Both of the Smart Views also work for your Whiteboard. You can focus on a particular question or see the entire page.
5. Integrate student work into your lessons
One of the best things about Goodnotes Classroom’s real-time sync of student work to the teacher device is that it is super easy to show their work in class. That way, you can show great work as inspiration for other students or use it as a basis for in-class discussion.
Goodnotes Classroom lets you control whether you want to present student work anonymously or not using the Presentation Mode preferences.
- while mirroring your iPad to an external screen, tap on the Share button at the top right of the Nav Bar
- under Presentation Mode, you can choose what your students should see on the external screen
- Choose Mirror Presenter Page or Mirror Full Page to project student work anonymously
- Choose Mirror Entire Screen if you want your students to see exactly what you’re seeing on your device, including the names of the students who produced a piece of work
6. Use AI to assist you with grading
Goodnotes Classroom has a built-in AI grading assistant that can help you cluster your student answers in a way which allows you to give feedback faster and get insights on how well your students understand a topic. Open the Smart View “by Question” to find the Smart Cluster option at the top left. Here you can cluster your student answers according to how closely they match a provided model answer.
Choosing a model answer
There are two ways to provide a model answer for a question that AI will use to cluster your student answers, which you can pick by tapping on Model Answer Source:
- Provide a model answer yourself by writing it on the whiteboard. Note that AI will include everything that you write on the whiteboard for that Answer Zone when doing the comparison
- Choose a model answer from one of the student answers.
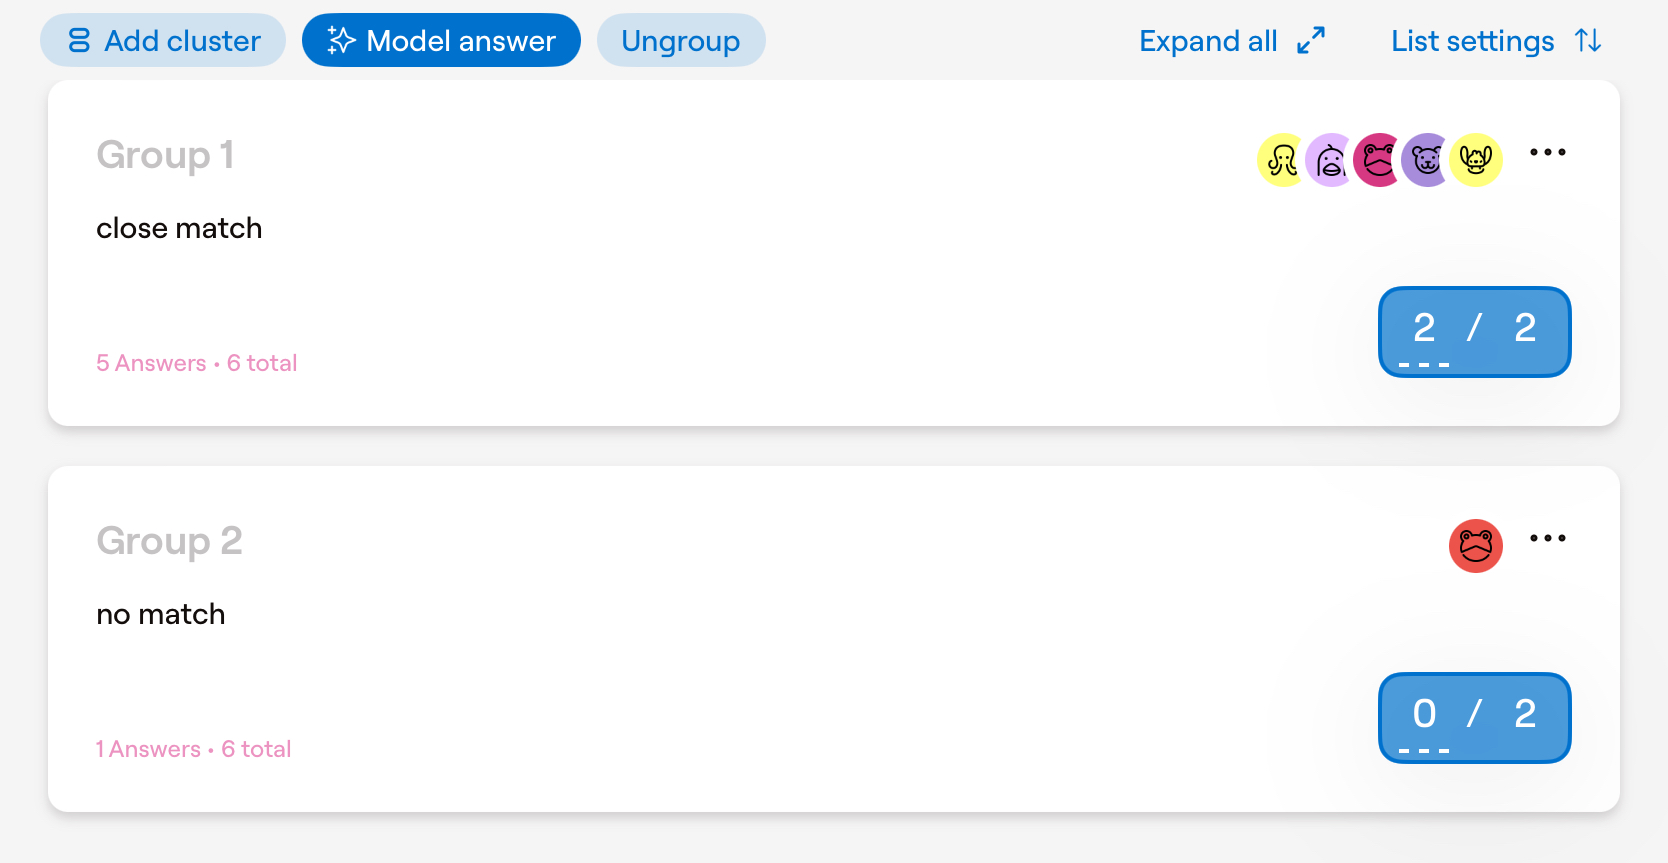
When you hit apply, AI will analyze the students’ handwritten, typed, or sketched responses and group them into up to three different groups: no match with the model answer, partly matches the model answer, and closely matches the model answer.
🤔 Limitations of AI
When using generative AI, it is important to understand the limitations. First of all, there is always a chance that the AI may produce wrong results, which is why we recommend always double checking the output yourself. Secondly, Compare to Model Answer currently works best on the following question types: Multiple Choice or Single Choice, Fill in the blank, True/False, and Short texts with objective correct/incorrect answers.
Your students can express their answer in multiple different ways, for example they can circle, tick, or hand write or type their choice for a multiple choice question. AI will still be able to group them into the same clusters. However, it currently can’t properly recognise sketches or images your students add. Further, you may find that there are some incorrect results when AI can’t read the student’s handwriting well enough.
Fortunately Goodnotes Classroom always gives you the option to overwrite what AI has done.
Organize student answers manually
If some of the student answers have been incorrectly clustered, or you don’t want to use AI in the first place, you can create clusters manually and move student answers between groups.
To create clusters manually, just tap the Add Cluster button at the top left of the screen, next to Smart Clusters. Student answers can be moved to another cluster by tapping on the … menu right next to the answer.
Give scores in batches
So apart from seeing how many students have no match, a partial match, or a close match with your selected model answer, what is the benefit?
Adding a score to an Answer Zone
Every Answer Zone has the option to define a maximum number of points your students can get for the question. To enable or disable that, go to Prep Mode, select the Answer Zone Tool, and then tap on any Answer Zone to select it. Tap on the selected Answer Zone again and choose Score Widget from the edit menu. Using the +/- buttons or your keyboard, you can adjust the maximum score students can get for the question.
Batch scoring in clusters
If an Answer Zone has a score, then you will have the ability to enter a score into one of your clusters once and every student answer in the cluster will automatically receive the same score. No worries, you can overwrite individual scores within the cluster as well.
💡Tip: If you don’t want to write the same feedback over and over again, use the Lasso Tool to copy your feedback and then paste it to every student in the same cluster or simply drag and drop it to duplicate the feedback.
7. Set up Assignments
With Goodnotes Classroom you can manage the entire workflow around assignments with just a few taps: Create assignments, distribute them to your students, let your students work on them while you can monitor them, let them return the assignments to you, then review and grade them before returning them.
Here’s an overview of how this works:
- In a Lesson, tap on the Share & Export button
- Choose “Create Assignment”
- Select the pages you want to include as part of the Assignment
- Fill out the information like description and due date
- Your students will get a notification within the Lesson that a new assignment is available
- While they work on the assignment, you can monitor their progress using either of the two Smart Views
- When a student returns the assignment, their page becomes locked and they can no longer make any edits until you return the assignment to them
- You can see the submission status for every student to see whether they have already handed in their assignment, and even if they have handed it in but missed the due date
- After grading the assignment, you return it, which will unlock the page/s for your students again and they will be able to see your feedback
Optionally, you can link your Google Classroom account to the Assignment feature. To read more about that, check out this article.
We hope that this guide has helped you to understand all the basic functionality of Goodnotes Classroom so that you feel comfortable using this new tool in your lessons. Along your journey, you’ll see how incredibly flexible Goodnotes Classroom is. Start off with a few simple use cases like sharing worksheets that you want to grade, but we’re sure you’ll soon find things you can do together with your students that you never thought were possible before.
